One of the many exciting announcements during Ignite was the unveiling of Copilot Studio, and of course we want to know everything about what this new addition has to offer. As soon as we open the gates of CoPilot via the link https://copilotstudio.microsoft.com, we are immediately immersed in a world of innovation and possibilities.
What sets Copilot Studio apart quickly becomes clear: it’s not just a new feature; rather, it is an advanced evolution of Power Virtual Agents. Here, the solid foundation of Power Virtual Agents is taken to new heights with the addition of advanced artificial intelligence. Copilot builds on the capabilities of Power Virtual Agents, which were already able to create powerful chatbots, and adds a touch of AI to make them even more powerful and intelligent.
So what new cool features have been added?
Topics with copilot
For those who have already worked with Power Virtual Agents, topics are nothing new. One could create a specific topic in which some possible interactions were anticipated and certain actions were taken based on the interaction with the user. A feature that was already well put together, but now you can create a topic with copilot! When you want to create a topic, you will now see 2 options:
- From blank: This is the old, manual way to click a topic together
- Create with Copilot: This is a new option where you do not have to click the topic together yourself, but you can describe which steps need to be taken for your topic, and Copilot will then do this for you

When we click on “Create with Copilot” we get to see the following screen where you can specify a subject for your topic and where you can describe which steps (nodes) this topic has to have:

For example I created a topic with copilot with this description:
“Let a user ask more information about Microsoft365. Reply to the user with a multiple option with the following options:
- SharePoint
- Power Apps
- Teams
When the user clicks on an option, you give the user information about the specific option”
Which resulted in the following topic:
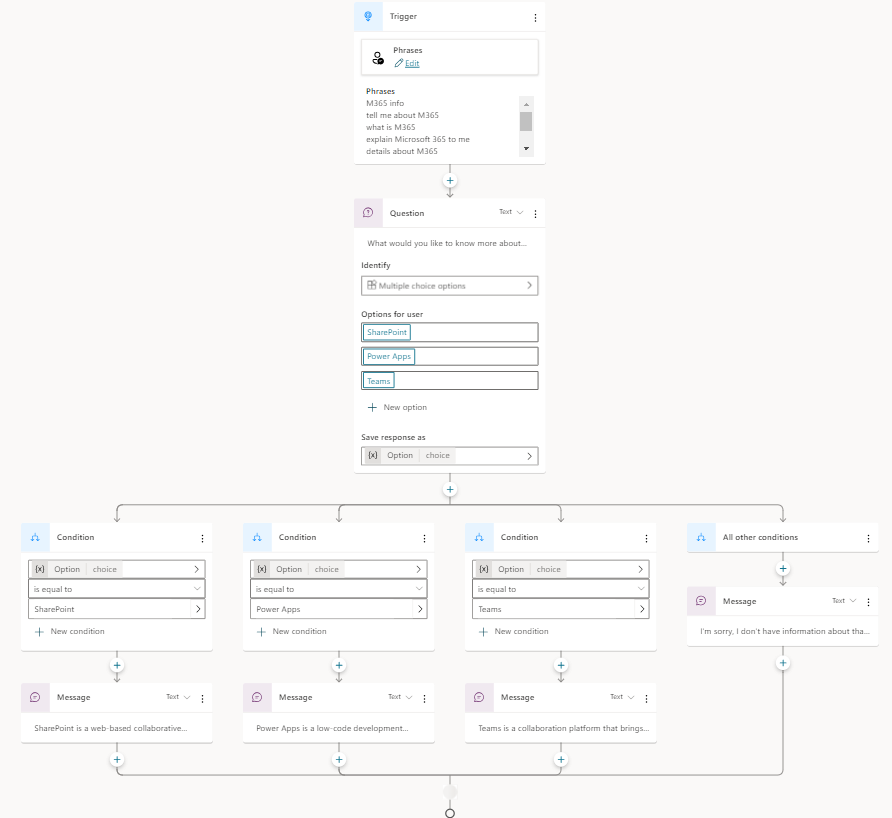
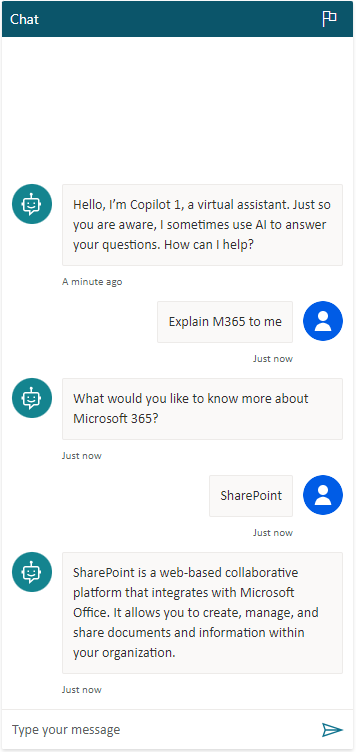
How cool is that? My whole topic is created by just describing what i needed. And my chatbot was actually ready to use:
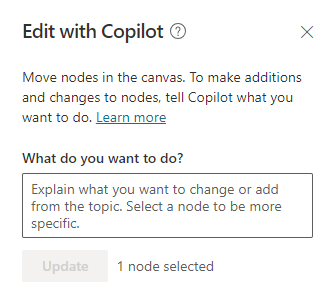
There is also the option to edit an existing node or to add a node by describing what it has to do. So you just don’t need to describe the whole picture. You can also change or add a node with Copilot!
Generative answers
Another new cool feature is generative answers. Before AI was called in, the Power Virtual Agent that was created would often “get stuck” when it no longer knew what to do. This resulted in the bot escalating to a live agent. With Generative answers you can now train the bot so that it can interact with the user itself without having to specifically define each step. When you create a new Copilot, you will see the option “Boost your conversations with generative answers”. Here you can add a website from which Copilot will get its information to interact with the user. For example I added the website of Disney World:
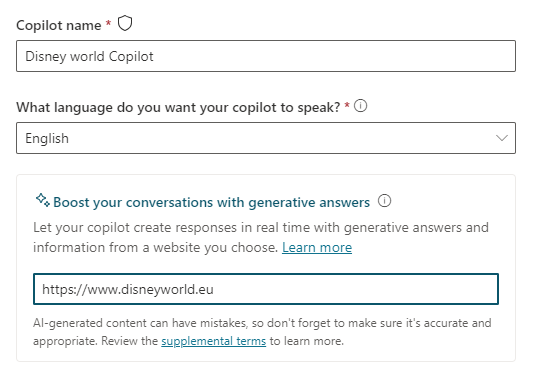
After that, your Copilot will be created. Let’s take a closer look at the Generative AI feature:

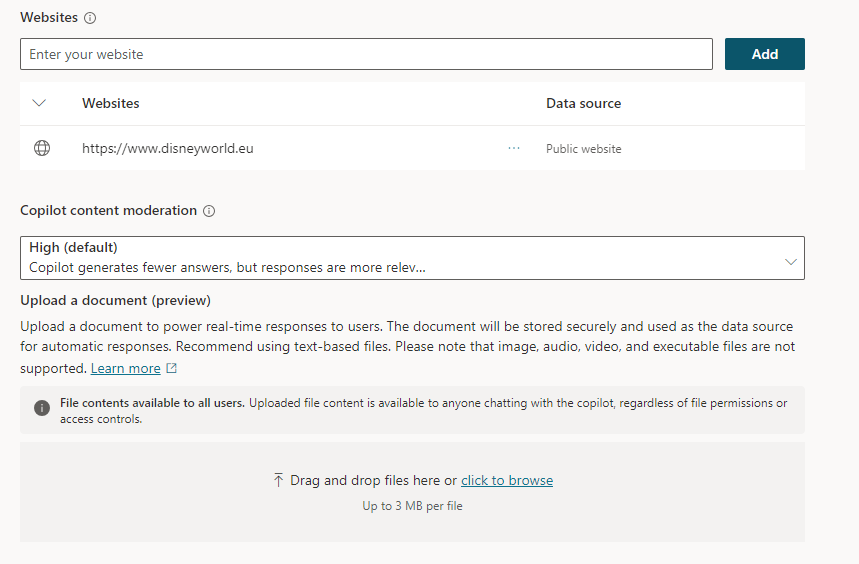
We can see here that you can add more then one website unlike the home screen and you can even provide documents to the Copilot. The rule here is simple: The more resources you offer the copilot, the better it can interact with the user.
Next to that, you can also choose the content moderation ranging from high where you will receive fewer answers but more relevant to low where you will receive more answers but possibly less relevant.
That’s it, I just added the Disney World website to my Copilot and as you can see below it can already interact very well with the user. We could summarize this in “Less is more” 😉


