

In the previous posts of this series, we laid the groundwork for building solutions with the SharePoint Framework (SPFx). From setting up the development environment to understanding the essential tools and technologies like npm, TypeScript, React, SCSS, and Fluent UI, you’re now equipped to dive into the fun part—building your first web part!
Web parts are the building blocks of modern SharePoint experiences, allowing developers to create custom, reusable components that enhance user productivity and engagement. In this post, we’ll guide you through the step-by-step process of creating your very first SPFx web part.
Getting started
Ready to get hands-on? Open your command prompt (or PowerShell both work perfectly for this process), navigate to the folder where you want your SPFx solution to live, and let’s get started!
Once you’re in the correct directory, it’s time to scaffold your SPFx solution. Run the following command:
yo @microsoft/sharepoint
So your terminal should look something like this:

When you run the Yeoman generator with the yo @microsoft/sharepoint command, it will guide you through a series of prompts to configure your SPFx project. Below is an example of the questions you’ll encounter and the answers used for this tutorial.
What is your solution name? SPFxWebpart
? Which type of client-side component to create? WebPart
Add new Web part to solution sp-fx-webpart.
(This is an informational message confirming your choice.)
? What is your Web part name? HelloWorld
? Which template would you like to use?
Minimal
No framework
❯ React

Once you’ve answered all the prompts, the Yeoman generator will begin setting up your SPFx project. This includes downloading and installing all the necessary Node.js modules required for your solution.
Heads-up: This process may take a few minutes, depending on your internet connection and system performance. Don’t worry if it seems to hang for a moment—just let it run to completion. You’ll see progress messages in your command prompt or PowerShell as the dependencies are installed.
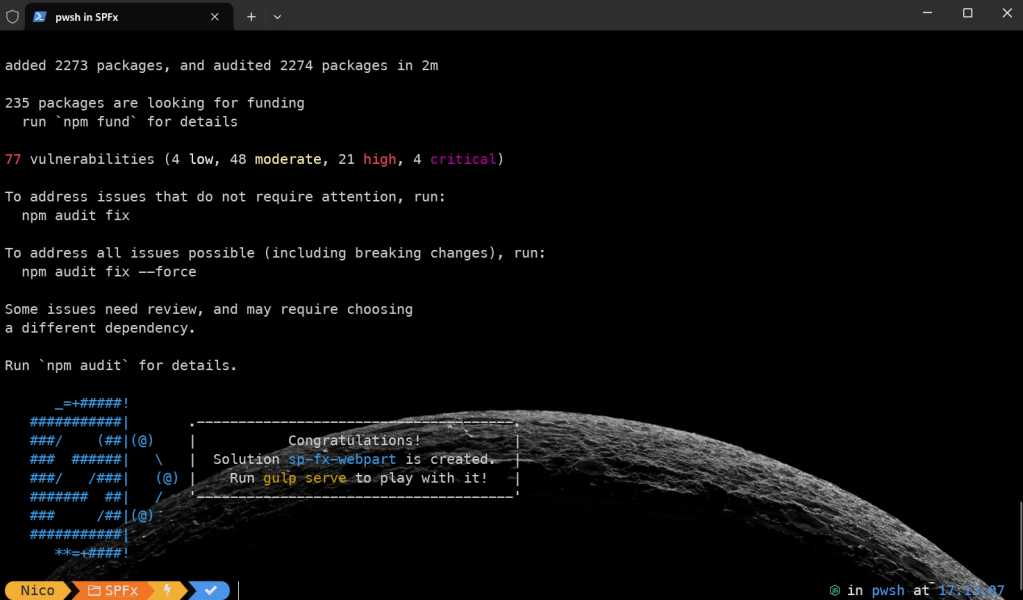
When the setup process finishes, you’ll have a fully initialized SPFx solution and you terminal should look something like this:
Opening your solution
With your SPFx solution now set up, it’s time to open it and start exploring the files and folders. You can use any IDE or code editor of your choice, but Visual Studio Code is highly recommended for SPFx development because of its rich extension ecosystem and seamless integration with TypeScript and React.
If you’re using Visual Studio Code, you can open the solution directly from the command line by typing:
code .
This command launches Visual Studio Code and loads your project in the current folder. If you’re using a different editor, open it and navigate to the folder where your solution resides.
Once your project is open, you’ll notice a well-organized structure with folders for your source files, configuration, and dependencies. In the next blogpost, we’ll take a closer look at the project structure and explain what each part is for.
Deploying your SPFx web part
Now that your SPFx solution is ready, let’s explore how to deploy it. Deployment in SPFx can be done in two main scenarios:
- Test deployment: For local testing or validation in a development environment.
- Production deployment: For live use in your organization’s SharePoint environment.
Test deployment
To test your SPFx web part, you can use the SharePoint Workbench, which allows you to preview and interact with your web part in a simulated environment. Here’s how:
Serve the project locally
Open your terminal in the project folder and run (Opening you terminal in Visual Studio Code can be done with CTRL + %):
gulp serve
You can see the terminal at the bottom of below print screen where I typed gulp serve before hitting enter.

This will build your project, start a local server, and open the SharePoint Workbench in your browser (if you’re working on a SharePoint Online site).
Note: The Workbench URL typically looks like this:
https://tenantdomain/_layouts/workbench.aspx
Replace {tenantdomain} with your actual SharePoint tenant domain.
Test your web part
Add your web part from the toolbox to the Workbench canvas. You can test its functionality, make adjustments, and instantly see changes as you update your code.
You can find your webpart under the Local category when clicking on the + sign in your local workbench:

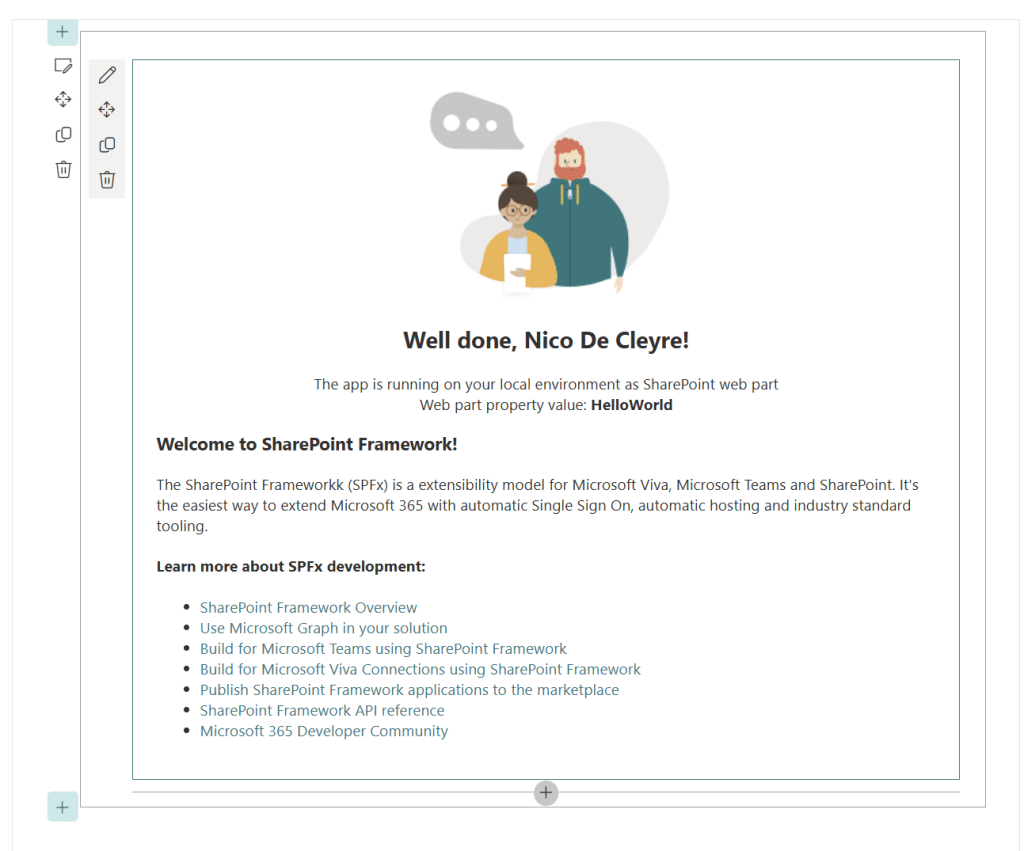
If everything went right, you should see your webpart like on the below image. Now you can start to make changes and test them locally before deploying to production.
Production deployment
When your web part is ready for real-world use, you’ll need to package and deploy it to your SharePoint environment. Follow these steps:
- Build the Solution for Production
Run the following command to create a production-ready bundle:
gulp bundle --ship
gulp package-solution --ship
These commands optimize your code and create a deployable package in the sharepoint/solution folder.
- Upload the Package to the App Catalog
- Navigate to your SharePoint App Catalog site.
- Upload the
.sppkgfile found in thesharepoint/solutionfolder. - Confirm the prompt to make the web part available to your sites.
- Add the Web Part to a Site
- Once deployed, the web part will be available in the site collection where it’s installed. You can add it to pages via the web part toolbox.
With these steps, you’re all set to deploy and use your SPFx web part in both development and production environments. 🎉
