
This blog post is part of a series. In this one we’ll highlight the usage of a refresh token. Check out the other posts about the other authorization flows:
- Mastering Access Token Acquisition: The authorization code flow
- Mastering Access Token Acquisition: Using a refresh token
- Mastering Access Token Acquisition: Client Credentials Flow
While using the client credentials flow with a client secret is one of my favorite ways to get an access token, using a certificate is one of the most secure. This is the same as using a client secret, except that you specify client_assertion and client_assertion_type in the body of the request instead of client_secret.
while the client_assertion_type parameter always has the same value, this form of authentication revolves around the client_assertion parameter. This is a JWT (JSON Web Token) that consists of the following three parts, seperated by a dot:
- An encoded base64 header
- An encoded base64 payload
- An encoded base64 signature
The security in this authentication form is the fact that you can indicate in the payload how long and until when exactly the JWT may remain valid. And the fact that the signature is digitally signed with the private key of your certificate. And so the App registration can check for authenticity before granting an access token, since this same certificate is configured in the Entra App Registration.
To obtain an access token with this authorization flow we have to do 3 things:
- Create a certificate an upload it in our Entra App registration
- Create a JWT
- Use this JWT to get an access token
Create the certificate
Let’s create the certificate first. We can do this using PowerShell. This certificate is added to the certificates location of the computer. Afterwards we will export it so that we can upload it in our Entra App registration. With this piece of PowerShell code we can create and export the certificate. Note that I use C: location to export my certificate to, but you can choose a location of your choice
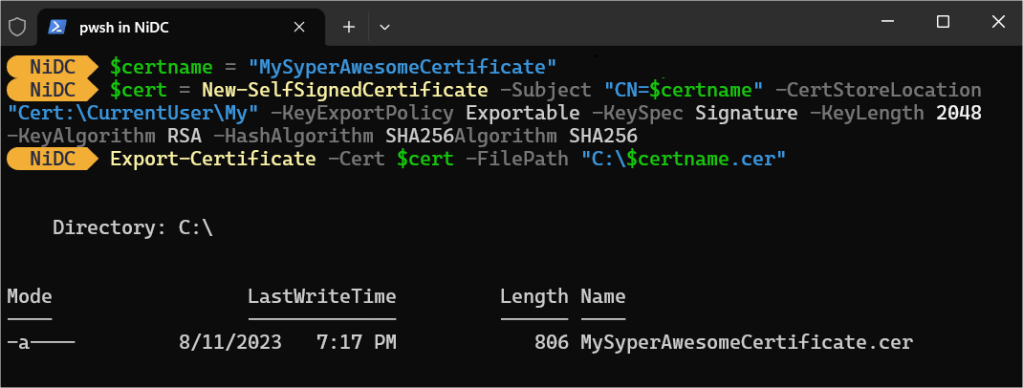
$certname = "MySyperAwesomeCertificate"
$cert = New-SelfSignedCertificate -Subject "CN=$certname" -CertStoreLocation "Cert:\CurrentUser\My" -KeyExportPolicy Exportable -KeySpec Signature -KeyLength 2048 -KeyAlgorithm RSA -HashAlgorithm SHA256
Export-Certificate -Cert $cert -FilePath "C:\$certname.cer"

Powershell
If everything goes well you should see something like this:
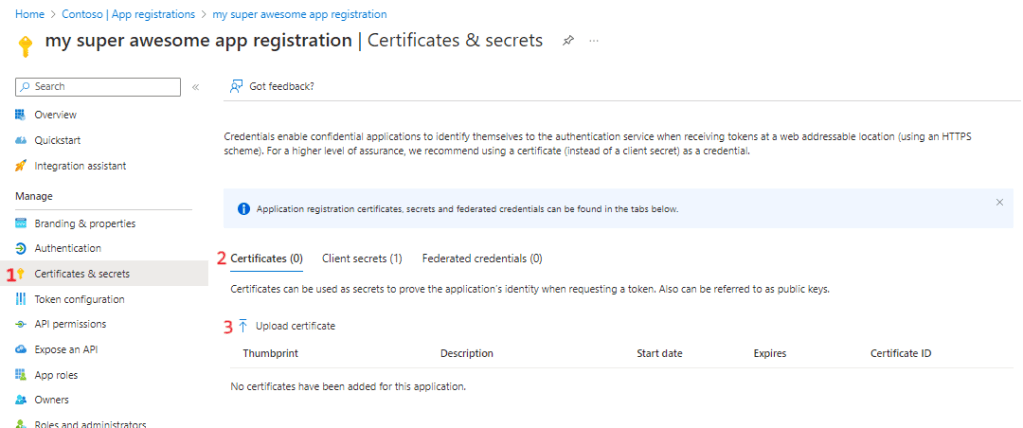
Now that we have our certificate, we can upload it to our Entra App Registration in the Certificates & secrets section:
- Click on Certificates & secrets
- Click on the Certificates section
- Click on Upload certificate
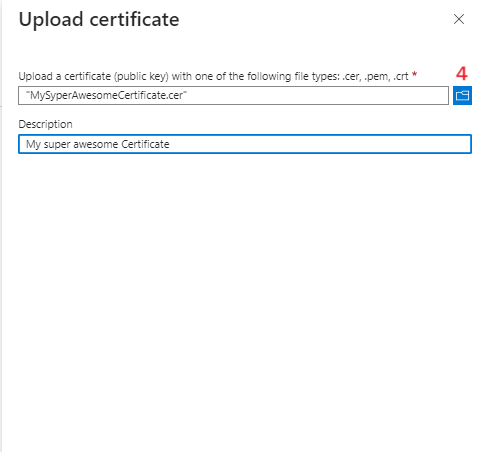
Next a panel slides open on the right. Select your certificate from the location where you exported it to and give your certificate a description (optional).
Create the JWT
For getting a JWT based on your certificate I use below PowerShell script. In this script you have to provide 3 parameters:
- Your tenant ID
- Your client ID
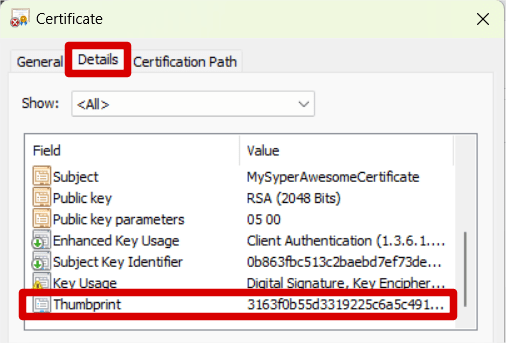
- The thumbprint of your certificate. If you don’t know how to get the thumbprint, you can open your certificate from where you exported it to and click on details. At the bottom of the details you will find the thumbprint
Two sections I want to highlight are the header and the payload. These are 2 objects that are eventually encoded to a base64 string. The header consists of the following parameters:
- alg: (algorythm) Should be RS256
- typ: (type) Should be JWT
- x5t: (X.509 Certificate SHA-1 Thumbprint) this is used to indicate the SHA-1 thumbprint of an X.509 certificate used for signing the JWT token.
The payload consists of the following parameters:
- aud: (audience) identifies the recipients that the JWT is intended for. In this case this is ‘https://login.microsoft.com/[YOUR_TENANT_ID]/oauth2/v2.0/token’.
- exp: (expiration time) this indicates when the JWT should expire. This ensures that the JWT is not valid indefinitely; but only for a certain period of time. The code snippet below uses 5 minutes
- iss: (issuer) It indicates who issued the JWT, i.e. the entity responsible for creating and signing the token. In this case the client ID
- jwt: (JWT ID) A unique identifier (GUID) for the token
- nbf: (Not Before) The time from when the token is valid.
- sub: (subject) The subject of the token, for example the entity the token applies to. Should be the same as iss, so your client ID
- iat: (issued at) The time when the token was issued
$TenantId = "[YOUR_TENANT_ID]"
$ClientId = "[YOUR_CLIENT_ID]"

# Load the self-signed and uploaded certificate using its thumbprint
$Certificate = Get-Item Cert:\CurrentUser\My\[YOUR_THUMBPRINT]

# Convert the certificate to a base64 string hash of the certificate
$CertificateAsBase64 = [System.Convert]::ToBase64String($Certificate.GetCertHash())

# Create a start date for creating a timespan
$StartDate = (Get-Date "1970-01-01T00:00:00Z").ToUniversalTime()

#Make a timespan from StartDate and let it expire after 5 minutes
$ExpirationTimeSpan = (New-TimeSpan -Start $StartDate -End (Get-Date).ToUniversalTime().AddMinutes(5)).TotalSeconds
$Expiration = [math]::Round($ExpirationTimeSpan, 0)

# Create a timespan before which the JWT MUST NOT be accepted for processing
$NotBeforeExpirationTimeSpan = (New-TimeSpan -Start $StartDate -End ((Get-Date).ToUniversalTime())).TotalSeconds
$Nbf = [math]::Round($NotBeforeExpirationTimeSpan, 0)

# Create the header
$Header = @{
    alg = "RS256"
    typ = "JWT"
    x5t = $CertificateAsBase64 -replace '\+', '-' -replace '/', '_' -replace '='
}

# Create the payload
$Payload = @{
    aud = "https://login.microsoftonline.com/$TenantId/oauth2/token"
    exp = $Expiration
    iss = $ClientId
    jti = [guid]::NewGuid()
    nbf = $Nbf
    sub = $ClientId
}

# Convert header to base64
$HeaderAsBase64 = [System.Convert]::ToBase64String([System.Text.Encoding]::UTF8.GetBytes(($Header | ConvertTo-Json)))

# Convert header to base64
$PayloadAsBase64 = [System.Convert]::ToBase64String([System.Text.Encoding]::UTF8.GetBytes(($Payload | ConvertTo-Json)))

# Combine header and payload with "." to form an unsigned JWT
$UnsignedJWT = $HeaderAsBase64 + "." + $PayloadAsBase64

# Retrieve the private key object from the certificate
$PrivateKey = ([System.Security.Cryptography.X509Certificates.RSACertificateExtensions]::GetRSAPrivateKey($Certificate))

# Create a RSA Signature padding
$RSASignaturePadding = [Security.Cryptography.RSASignaturePadding]::Pkcs1

# Create a hashalgoritm
$HashAlgorithmName = [Security.Cryptography.HashAlgorithmName]::SHA256

# Create the JWT signature
$JWTSignature = [Convert]::ToBase64String($PrivateKey.SignData([System.Text.Encoding]::UTF8.GetBytes($UnsignedJWT), $HashAlgorithmName, $RSASignaturePadding)) -replace '\+', '-' -replace '/', '_' -replace '='

# Combine the signature with the JWT using "."
$SignedJWT = $UnsignedJWT + "." + $JWTSignature


Powershell
Get the access token
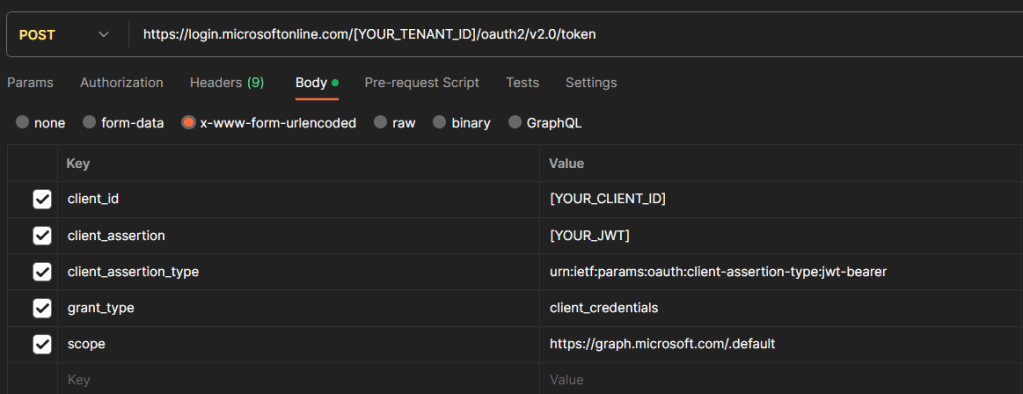
to retrieve the access token we need to make a POST request to the ‘https://login.microsoft.com/[YOUR_TENANT_ID]/oauth2/v2.0/token’ endpoint with the following parameters in the body of the request:
- client_id: the id of your client, can be found in the home screen of your app registration.
- client_assertion: The JWT we put together with the PowerShell script above ($SignedJWT)
- client_assertion_type: urn:ietf:params:oauth:client-assertion-type:jwt-bearer
- grant_type: client_credentials
- scope: the scope must be the resource identifier of the application against which you want to use your access token, added with .default. For Microsoft Graph this would be for example ‘https://graph.microsoft.com/.default’.
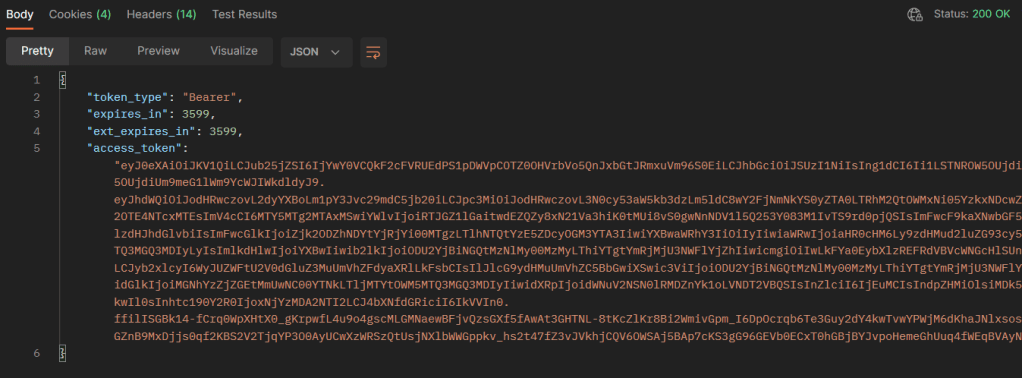
If everything goes well, you should get a response like this: